Responsive email workflow in less than 5 minutes
Up until recently I was coding emails without the aid of any tools or frameworks. I thought there had to be a better way? I looked for the answer which lead to the creation of MJML Multi Project which we will be using this today so let's get started.
Set Up
In a new working directory clone the MJML Multi Project by running the following command:
git clone git@github.com:garmeeh/mjml-multi-project.git
Next we want to initialise the project. We will do that by running the following commands:
Note:I will be using yarn but if you prefer, you can use npm
cd mjml-multi-project/
yarn install
Lets remove the demo files and initialise a clean Git repository:
yarn clean-up
git init
We now have a clean working directory to start building responsive emails so lets create one right now!
To keep it simple we will re-create the example one: A promotional email for Cuppas a fictional coffee shop.
We first need to a project/brand directory to house all it's emails. We have an easy command to scaffold new project directories:
yarn create-project "cuppas"
This command also added these directories:
common- partials such as headers and footers that can be re-usedCOMPILED_TEMPLATES- compiled HTML emailstemplates- MJML templates
Note:
If you have a look in projects.config.js you will see cuppas listed in the projects array. This is a left over from the example project. If creating a new project you will need to add it to this array.
Your First Email
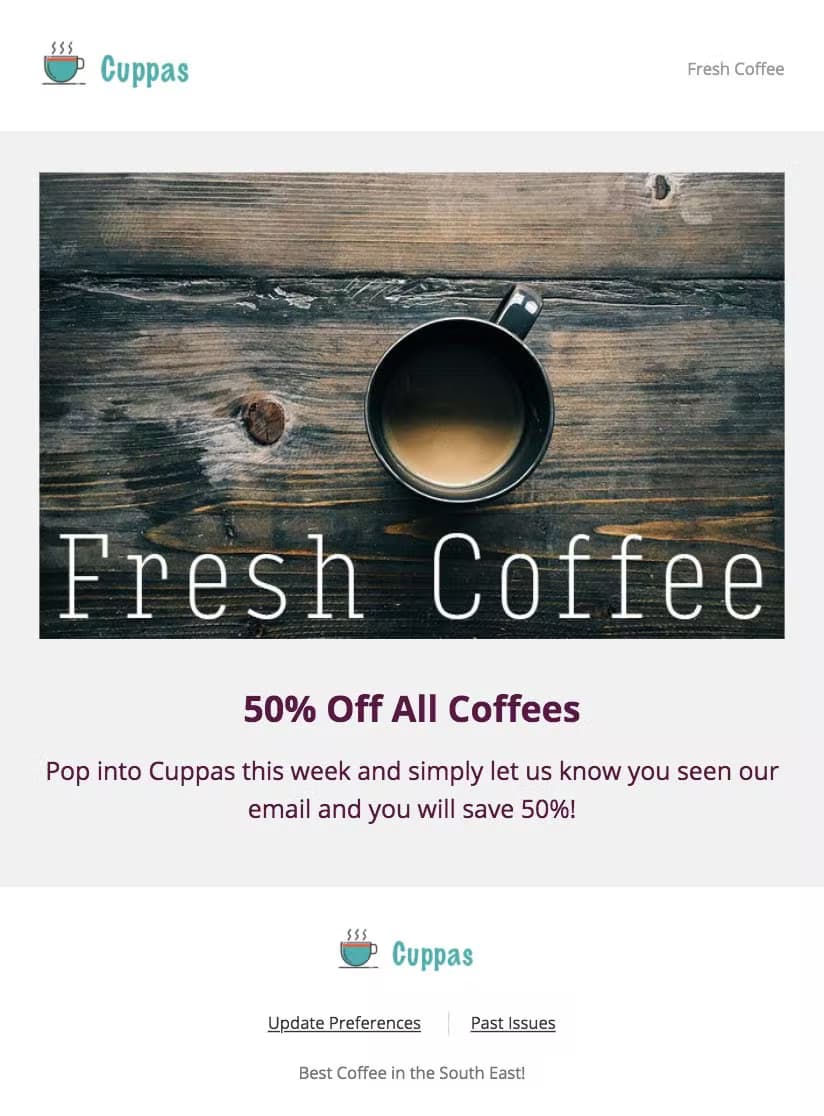
This is the email we will be creating:

The email is built up of some reusable partials:
- Header
- Footer
- Defaults
Along with the main email itself that brings these together.
In the common directory create the following files and paste the snippets:
<!-- file: defaults.mjml -->
<mj-font
  name="Open Sans"
  href="https://fonts.googleapis.com/css?family=Open+Sans:400,700"
/>

<mj-attributes>
  <mj-all font-family="Open Sans, Helvetica, Arial, sans-serif" padding="0" />
</mj-attributes>
This includes a new font and sets the font for any email that includes this file. We also reset padding to zero on all MJML elements.
<!-- file: footer.mjml -->
<mj-section
  background-color="#ffffff"
  padding="30px 0 42px 0"
  full-width="full-width"
>
  <mj-column>
    <mj-image
      src="https://prismic-io.s3.amazonaws.com/gary-blog%2F4b23880b-4f7f-40af-9e70-8476486052c7_cuppas.jpg"
      alt
      padding="0 0 12px 0"
      width="110px"
      align="center"
    />
    <mj-table align="center" width="initial" padding="12px 0 0 0">
      <tr>
        <td>
          <table width="100%">
            <tr valign="middle" style="font-size: 12px;">
              <td>
                <a
                  href="https://www.garymeehan.ie/"
                  style="padding-right: 16px; color: #333333;"
                  >Update Preferences</a
                >
              </td>
              <td>
                <a
                  href="https://www.garymeehan.ie/"
                  style="padding-left: 16px; border-left: 1px solid #d8d8d8; color: #333333;"
                  >Past Issues</a
                >
              </td>
            </tr>
          </table>
        </td>
      </tr>
    </mj-table>
    <mj-text
      align="center"
      font-size="12px"
      color="#777777"
      padding="10px 10px 5px 10px"
      line-height="26px"
    >
      Best Coffee in the South East!
    </mj-text>
  </mj-column>
</mj-section>
Nothing special happening here, it contains this brands footer. We can code this once and include it in our future emails. This will save on coding and the need for testing. If we have any future design updates we will only need to update one footer!
<!-- file: header.mjml -->
<mj-section background-color="#ffffff" padding="30px" full-width="full-width">
  <mj-group>
    <mj-column>
      <mj-image
        src="https://prismic-io.s3.amazonaws.com/gary-blog%2F4b23880b-4f7f-40af-9e70-8476486052c7_cuppas.jpg"
        width="120px"
        alt
        align="left"
      />
    </mj-column>
    <mj-column vertical-align="bottom">
      <mj-text
        font-size="12px"
        line-height="22px"
        color="#999999"
        align="right"
        padding="0 0 4px 0"
      >
        Fresh Coffee
      </mj-text>
    </mj-column>
  </mj-group>
</mj-section>
Same idea here as in the footer.
Next up is the email itself which will use these reusable includes. Lets create another file: hello-world.mjml in the templates directory and add the following:
<!-- file: hello-world.mjml -->
<mjml>
  <mj-head>
    <mj-title>Hello World</mj-title>
    <mj-include path="../common/defaults.mjml" />
  </mj-head>
  <mj-body>
    <mj-include path="../common/header.mjml" />
    <mj-wrapper padding="0" background-color="#f1f1f1" full-width="full-width">
      <mj-section padding="30px">
        <mj-column>
          <mj-image
            src="https://prismic-io.s3.amazonaws.com/gary-blog%2F0082b1c5-16ce-46f4-af5b-bb098f8722e0_fresh-coffee.jpg"
            alt="Picture of a cup of coffee"
          />
          <mj-text align="center" padding-top="20px">
            <h1 style="color: #581845">50% Off All Coffees</h1>
            <p style="color: #581845; font-size: 18px; line-height: 28px;">
              Pop into Cuppas this week and simply let us know you seen our
              email and you will save 50%!
            </p>
          </mj-text>
        </mj-column>
      </mj-section>
    </mj-wrapper>
    <mj-include path="../common/footer.mjml" />
  </mj-body>
</mjml>
As you can see here we are including the Header and the Footer along with the Defaults. We define the title of the email using <mj-title></mj-title>. The rest is MJML markup building out the email itself. I'm not going to go detail on the MJML markup in this post as MJML has excellent documentation.
Compile and Send
How are we doing for time? I think we are doing OK!
We now have an MJML template but we need it to be HTML. Lets take all the parts you have put together above and generate a HTML email now. All you need to do is run:
yarn compile-all
Now if you check in the COMPILED_TEMPLATES directory you will see hello-world.html. Open this to have a look at the result.
At this point your HTML email ready to send. You can take this and upload to somewhere like Mailchimp as a template. But for now we will use PutsMail to send a quick test email to ourselves.
Head on over to PutsMail and do the following:
- Add the email you want to send your email to
- Enter a subject line
- Paste the HTML code (from hello-world.html)
- Leave "Move my CSS inline when I click Send Email" unticked!
- Click Send Email.
You should get an email asking you to confirm you opted for this and as soon as you accept, you should get your email!
Conclusion
So there you have it. You now have a workflow/platform to start working on all of your responsive emails. What I love about this set up is that you can have multiple clients or brands all running from the same project. A huge shout out to everyone who worked on MJML as it's an amazing framework.
For a more in depth look at what lead to MJML Multi Project make sure to check out my previous post, Emails. Yes Emails.
Bonus Points
- Make sure to check out the documentation for MJML Multi Project to find out about watch mode and other commands that are available.
- If you use Visual Studio Code, Atom or Sublime make sure to check out the plugins for them.